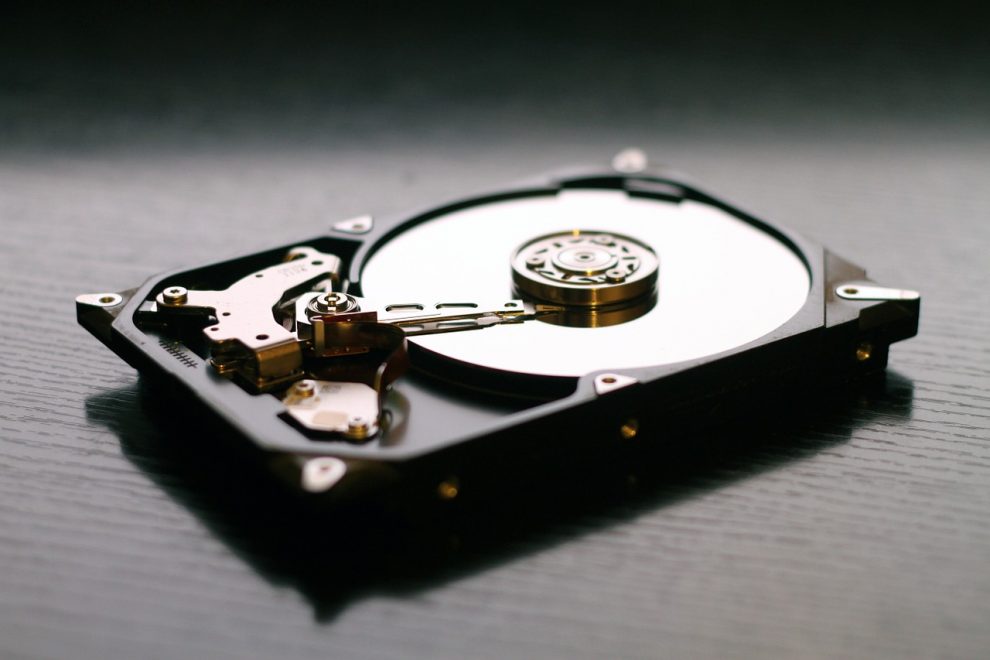
Your hard drive is the soul of your PC, the place where all your most important data is stored. While most PC components can be replaced, the invaluable data on your hard drive can’t if you haven’t created a backup. For this reason, ensuring your hard drive stays healthy is crucial (anyone get the dull hard drive-related pun?).
Worried About Your Hard Disk? Here Are 4 Ways to Check Hard Disk Health on Windows, In this article we guide you to check your heard disk health.
There are various ways to check on your hard drive health – from built-in methods in Windows to your HDD manufacturer’s diagnostic tools, and we’re going to talk you through the best methods.
1. Use The HDD Manufacturer’s Tools
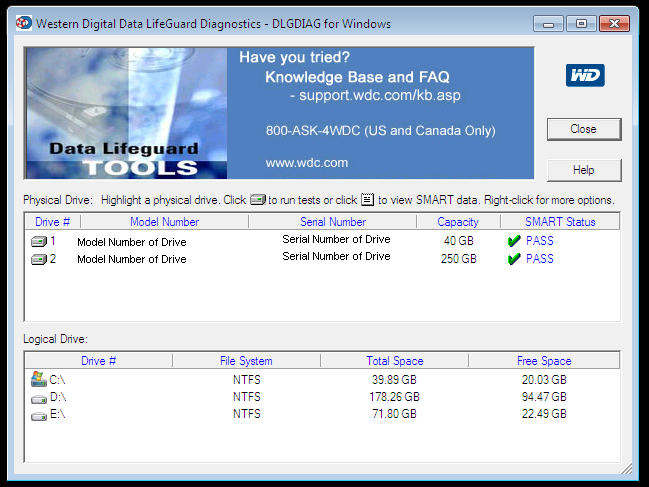
Most major hard drive manufacturers provide free robust tools to monitor your hard drive health and performance. The first step to knowing which one to use is, of course, knowing the make of your hard drive.
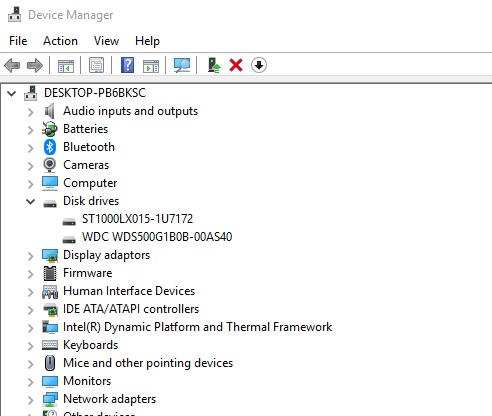
If you know the make of your hard drive, you can skip this part. If you don’t, press the Win key, type “device manager” and click it when it appears in the search results.
In Device Manager unstack the “Disk drives” option and make a note of the model number of your hard drive. Next, type the model number into Google to bring up results that will show you the make of the hard drive.
After that, go to the manufacturer’s support page and search for their hard drive utility. To help you out, here are links to the relevant download pages of some of the biggest hard drive brands:
Each of these tools functions a little differently, but most importantly, each one has diagnostic features that let you test your hard drive health.
2. Windows CHKDSK Tool
Windows CHKDSK Tool is a built-in Windows tool that will scan your disk to find system errors and bad sectors and show if there are any problems with your hard disk. It will both scan and fix problems it can fix and will let you know if there is a bigger problem that it can’t fix. You can use this tool to both check hard disk health and fix bad sectors and errors if possible.
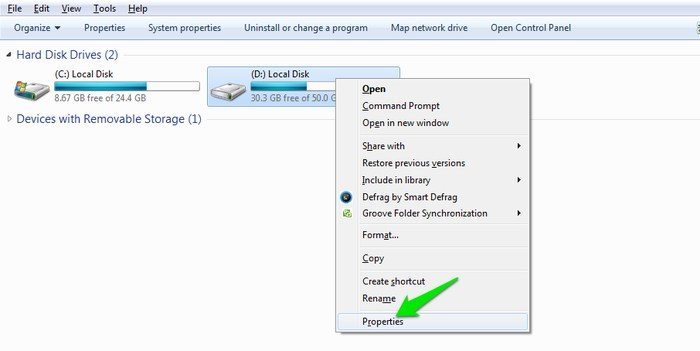
To use CHKDSK, right-click on the drive which you would like to check for errors, and select “Properties.” Then click on the “Tools” tab, and then click on the “Check now” button.
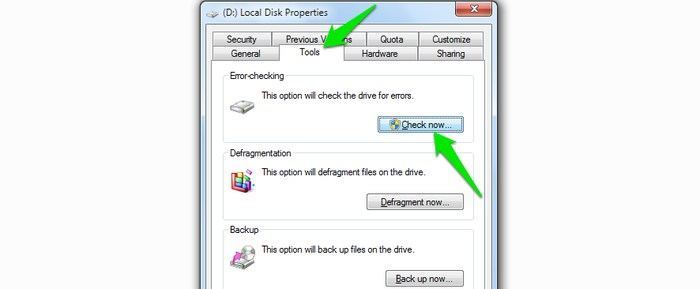
A dialog will open up with two options to fix errors and scan for bad sectors. You can select these options if you want to fix errors and bad sectors; otherwise you can just click on “Start” to get a basic report of hard disk problems (if there are any).
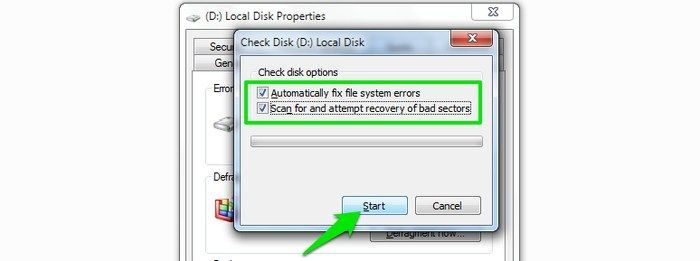
This tool is very basic and focuses on finding system errors and bad sectors. It will just let you know if there are any big problems and nothing more, so only use it as a basic hard disk checking and fixing tool.
3. Use WMIC
WMIC is a command-line interface that lets you perform many administrative tasks, including checking hard disk health. It uses the S.M.A.R.T (Self-Monitoring, Analysis and Reporting Technology) feature of hard disks to see status and provide a simple conclusion, like “OK” or “Pred Fail,” etc. It is still a very basic command that offers very little information, but it is quick and a built-in feature of Windows.
To check a hard disk with WMIC, press the Win + R buttons to open the Run dialog. Type cmd and click “OK” to open the Windows command prompt.
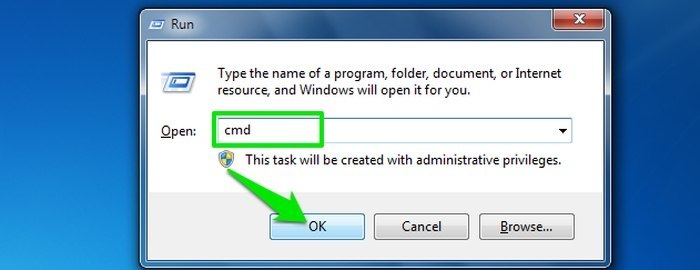
Type
wmic
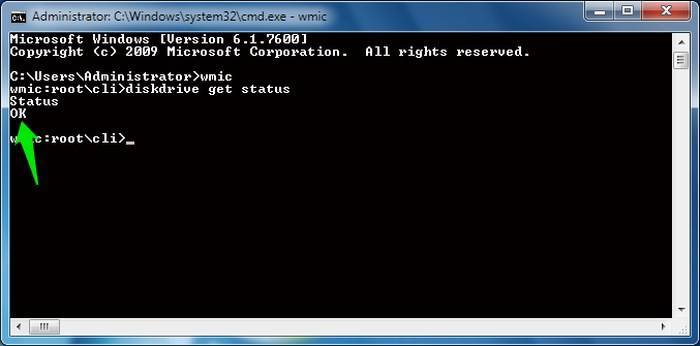
and hit Enter. When the WMI interface is ready, type
diskdrive get status
and press Enter again. You will see the status of your hard disk after a short delay.
4. Use a Third-Party Hard Disk Health Checking Tool
You can also use a third-party hard disk health checking tool that will offer much more information than just good or bad status. These tools use the same “S.M.A.R.T” feature of hard disks to fetch data, just like WMIC. However, they provide all the details to you, instead of just showing good or bad status.
CrystalDiskInfo
For this purpose, CrystalDiskInfo is a really simple, yet powerful, tool. It is a free-to-use tool that is extremely light and offers all the required information, such as temperature, health status, hard disk type and features, and other attributes like read/write error rate and spin-up time, etc.
The standard tool comes as a 4 MB .exe file, and its installer contains ads, so make sure you use the “Custom Installer” option and uncheck the side tool (ad). Once installed, all you need to do is launch the program, and you will see all the information about your hard disk(s) in the main interface. The tool will also check the hard disk health after every 10 minutes (by default) and alert you if there is anything wrong.
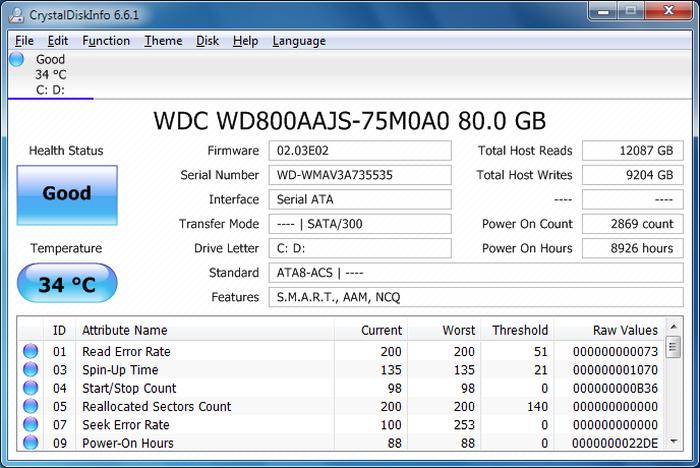
There are also other third-party hard disk health-checking tools like Hard Disk Sentinel and HDDScan. These are much more advanced with loads of extra features, but for an average user CrystalDiskInfo should work perfectly.
Conclusion
You can use the above-mentioned tools to check hard disk health in your Windows PC. If you don’t need extra details, then the Windows built-in tools should work great. Otherwise, it is recommended to download a third-party hard disk health checking tool.





Add Comment