How to rebuild Icon Cache in Windows 10: Icon cache is a storage location where the icons that are used by your Windows documents and programs are stored for faster access rather than load them every time they are needed. When there is a problem with the icons on your computer rebuilding or fixing the icon cache will definitely fix the problem.
Sometimes once you upgrade an application along with the upgraded application has a new icon but instead, you are seeing the same old icon for this application or you’re viewing destructed icon it implies Windows icon cache gets corrupted and its time to fix icon cache.
How the Icon Cache Works
Before learning How to rebuild Icon Cache in Windows 10 you must first be aware of how the icon cache work, so icons are everywhere in windows and having to retrieve all the icon images from hard disk every time they are needed can consume a lot of windows resources that is where icon cache steps in. Windows keeps a copy of all the icon there which are easily accessible, whenever windows need an icon, it simply fetches the icon from the icon cache instead of fetching it from the actual application.
Whenever you shut down or restart your computer, icon cache writes this cache to a hidden file, so that it doesn’t have to reload all those icons later.
Where is the icon cache stored
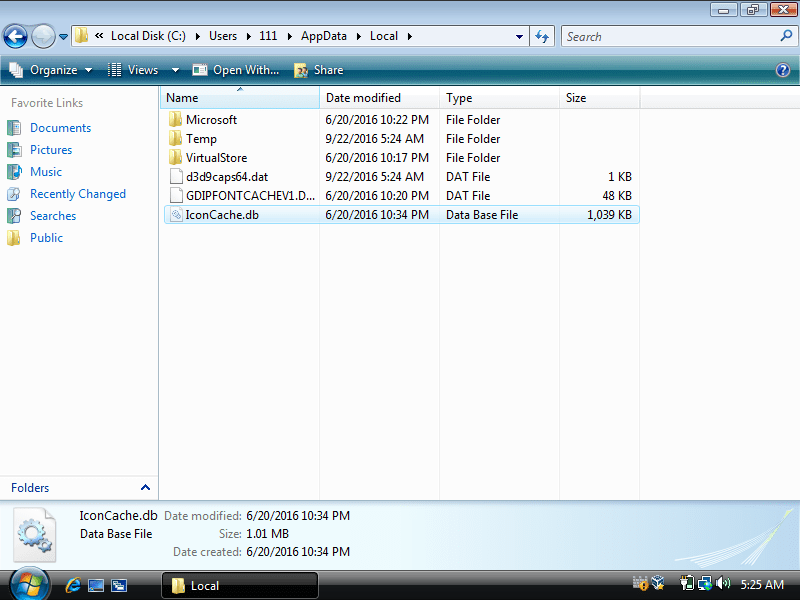
All the above information is stored in a database file called IconCache.db and in Windows Vista and Windows 7, the icon cache file is located in:
C:\Users\<your username>\AppData\Local\IconCache.db
 NOTE: Replace <your username> with the actual username of your Windows account.
In windows 8 and 10 the icon cache file is also located at the same location as above but windows do not use them to store the icon cache. In windows 8 and 10, the icon cache file is located in:
C:\Users\<your username>\AppData\Local\Microsoft\Windows\Explorer
 NOTE: Replace <your username> with the actual username of your Windows account.
In this folder, you will find a number of icon cache files namely:
- iconcache_16.db
- iconcache_32.db
- iconcache_48.db
- iconcache_96.db
- iconcache_256.db
- iconcache_768.db
- iconcache_1280.db
- iconcache_1920.db
- iconcache_2560.db
- iconcache_custom_stream.db
- iconcache_exif.db
- iconcache_idx.db
- iconcache_sr.db
- iconcache_wide.db
- iconcache_wide_alternate.db
To rebuild icon cache, you have to delete all the icon cache files but it’s not simple as it may sound because you can’t normally delete them by just pressing delete as these files are still used by Explorer, so you can’t delete them but hey there is always a way.
How to Rebuild Icon Cache in Windows 10
1.Open File Explorer and go to the following folder:
C:\Users\<your username>\AppData\Local\Microsoft\Windows\Explorer
NOTE: Replace <your username> with the actual username of your Windows account. If you don’t see the AppData folder then you have to go to folder and search option by clicking “My computer or This PC” then click on “View” and then go to “Options” and from there click on “Change folder and search options.“
In Folder Options select “Show hidden files”, folders, and drives and uncheck “Hide protected operating system files.“
After this, you will be able to see the AppData folder.
2.Press and hold the “Shift” key and right-click on the Explorer folder then select “Open command window here.“
3.A command prompt window will open at that path:
4.Type dir command into the command prompt in order to make sure you are in a correct folder and you should be able to see iconcache and thumbcache files:
5.Right-click on the Windows taskbar and choose “Task Manager.”
6.Right click on “Windows Explorer” and choose “End task” this will make desktop and explorer will disappear. Exit Task Manager and you should be only left with command prompt window but make sure no other application is running with it.
7.In the command prompt window type the following command:
del iconcache*
Press enter and that should delete all the icon cache file.
8.Again run the dir command to check the list of remaining files and if there are still some icon cache files, it means some application is still running so you need to close the application through taskbar and repeat the procedure again.
9.Now sign off from your computer by pressing Ctrl+Alt+Del and choose “Sign out.“ Sign back in and any corrupted or missing icons should hopefully get rebuild.
That’s it you have successfully learned How to rebuild Icon Cache in Windows 10 and by now issues with Icon cache may have been resolved. Remember this method will not fix the issues with the thumbnail, for that go here. If you still have any doubt or question regarding anything feel free to comment and let us know.
