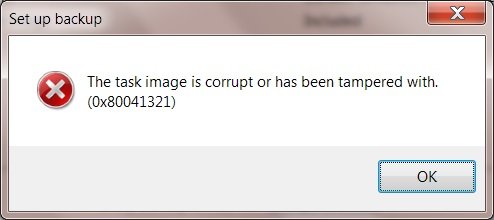
If you receive an error message The Task image is corrupt or has been tampered with error code 0x80041321, then its related to a corrupt scheduled backup task. The problem here is that when the task service plans to execute a task, it validates a few things. If it finds any integrity issue or registry corruption, it will mark those tasks as corrupt. The good news is that there is a way to fix this issue.
The task image is corrupt or has been tampered with (0x80041321)
Before trying to fix this. The task image is corrupt or has been tampered with error, we suggest checking an important thing. Make sure to check every option of the task and verify if it’s not associated or trying to run a file which it should not. Some of the forums have informed about malware association. Try this now.
- Use Registry editing and fix corrupted tasks
- Delete Schedule Keys
- Delete the WindowsBackup file
- Delete the task from the Task Scheduler
- Refresh User_Feed_Synchronization.
Since we are going to edit registry entries, make sure to create a restore point. If things go sideways, we can use the restore point to back to working condition.
1. Use Registry editing and fix corrupted tasks
The right way to fix this issue is by using Registry editing for those tasks, and also correcting the corrupted tasks in System32.
As we are dealing with Backup triggered by TaskScheduler, you should know that entries for the tasks are available at different places.
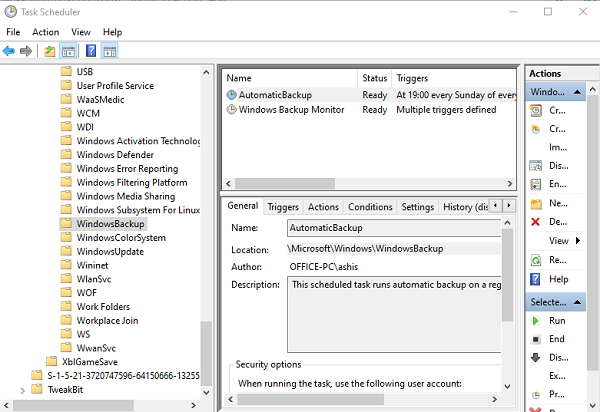
Task Scheduler: It is available at
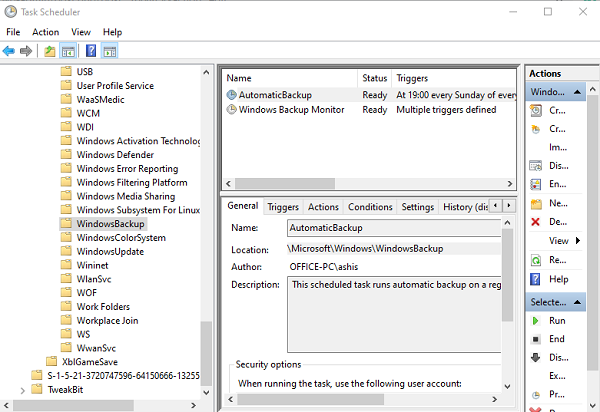
Task Scheduler Library > Microsoft > Windows > Windows Backup
Registry editor: It is available at
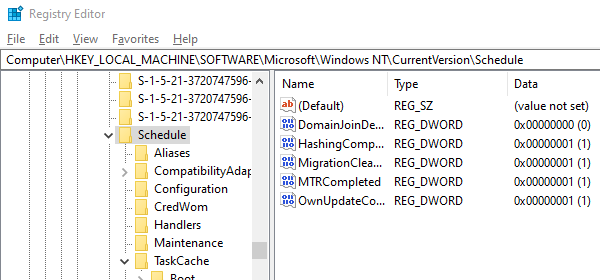
HKEY_LOCAL_MACHINE \ SOFTWARE \ Microsoft \ Windows NT \ CurrentVersion \ Schedule \ WindowsBackup \ AutomaticBackup \
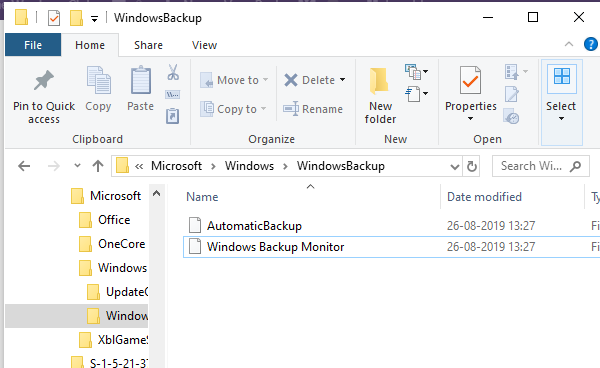
Windows System folder: It is available at
C:\Windows\System32\Tasks\Microsoft\Windows\WindowsBackup
Make sure the name of the task name is precisely the same everywhere. Make a note of the name.
Step 1: Delete Task-related Registry entries
Go to this key:
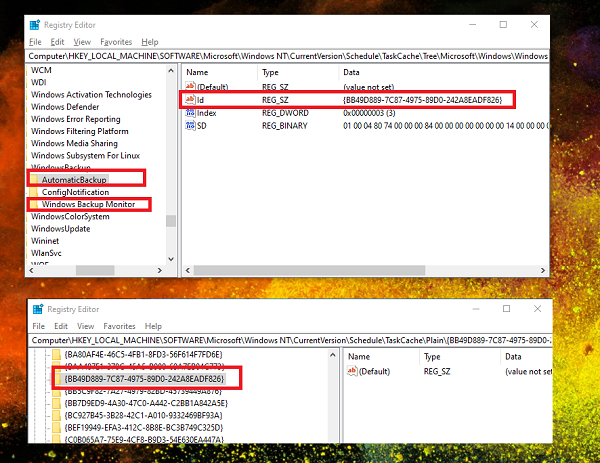
Computer\HKEY_LOCAL_MACHINE\SOFTWARE\Microsoft\Windows NT\CurrentVersion\Schedule\TaskCache\Tree\Microsoft\Windows\WindowsBackup
Note the GUID value in the “ID” entry of the task in folder AutomaticBackup and Windows Backup Monitor.
Next, remove the tasks registry entries associated with the ID from these places.
The task will be available at one of these places.
- HKEY_LOCAL_MACHINE\SOFTWARE\Microsoft\Windows NT\CurrentVersion\Schedule\TaskCache\Plain
- HKEY_LOCAL_MACHINE\SOFTWARE\Microsoft\Windows NT\CurrentVersion\Schedule\TaskCache\Logon
- HKEY_LOCAL_MACHINE\SOFTWARE\Microsoft\Windows NT\CurrentVersion\Schedule\TaskCache\Boot
Step 2: Create a temporary copy of the corrupted task file
Go to-
C:\Windows\System32\Tasks\Microsoft\Windows\WindowsBackup
Locate the task(s )— AutomaticBackup and Windows Backup Monitor — and copy it to somewhere you can keep it safe.
Step 3: Clean up the corrupted task
Delete the same task file from-
C:\Windows\System32\Tasks\Microsoft\Windows\WindowsBackup
Step 4: Re-create the task by using the temporary backed-up copy
We will import the tasks again, which can be done in two ways. Using Import Task in the Task Scheduler or the Command Prompt/PowerShell
Task Scheduler
- Open Task Scheduler > Navigate to Microsoft\Windows\WindowsBackup
- Click on Action menu and then on Import task.
- Navigate to the backed up files, and import it.
Command Prompt
- Open Command Prompt with admin privileges
- Type Schtasks.exe /CREATE /TN <New_Task_Name> /XML <Xml_File_Name>
Once the tasks are created, manually run the task, and check if there is an error.
2. Delete Schedule Keys in the Registry
Open Registry Editor
Navigate to-
HKLM\SOFTWARE\Microsoft\Windows NT\Current Version\Schedule and then delete its subkeys.
Exit Registry editor.
Now check if Backup Task works.
3. Remove the WindowsBackup file
In the first method, we were fixing the corrupt registry keys. If that didn’t work, the problem could be with corrupt Task files. These are XML files which include parameters, programs to use and so on. So if the file is corrupt, the task scheduler will fail to run it, and give an error — The Task image is corrupt or has been tampered with.
There are two ways to delete it. Navigate to-
C:\Windows\System32\Tasks\Microsoft\Windows\WindowsBackup
Remove all the files, or you can delete from the command prompt using the DEL command.
Having done that, go back to Backup and Restore in the control panel, and set up Windows Backup again.
4. Delete the task from the Task Scheduler
If you are not comfortable with deleting the files from the Windows Explorer, then you can delete it using Task Scheduler.
Open Task Scheduler > Navigate to Task Schedule Library\Microsoft\Windows\WindowsBackup.
Delete both the tasks.
Re-setup Windows Backup again.
Go to Task Manager, and rerun the AutomaticBackup task to check if it’s working.
5. Refresh User_Feed_Synchronization
It has been reported at Microsoft forums that enabling and disable User Feed Sync aka User_Feed_Synchronization task sometimes help. I would suggest using this as last resort if nothing else works. The task is responsible for updating RSS feeds in Edge/Internet Explorer
- Use Win+X and then select PowerShell (admin)
- In the prompt type, msfeedssync disable and enter.
- Repeat the same with command msfeedssync enable
You will not see anything substantial happening. However, it will restart the program, which in turn helps to fix error— The task image is corrupt or has been tampered with (0x80041321).
The suggestions have been sourced from Microsoft here and here. We hope one of the solutions worked for you and helped you to keep the Windows Backup Restore going on well.




Add Comment